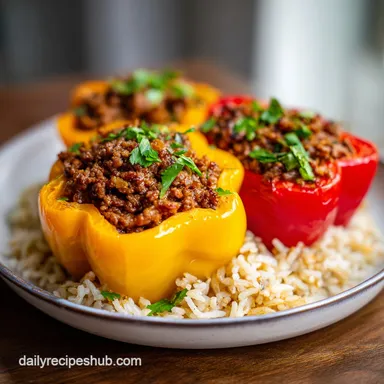
Stuffed Bell Peppers: Savory and Tender
- Time:15 minutes active + 45 minutes baking = Total 60 minutes
- Flavor/Texture Hook: Savory, mahogany crusted cheese with tender crisp pepper shells
- Perfect for: Weeknight family dinners or healthy meal prep
- Easy Classic Stuffed Bell Peppers
- The Secrets Behind the Flavor
- Component Analysis
- Choosing Your Best Ingredients
- Tools You'll Actually Use
- Step-by-Step Cooking Guide
- Solving Common Cooking Issues
- Tweak Your Filling Options
- Adjusting the Batch Size
- Debunking Kitchen Myths
- Storage and Zero Waste
- Perfect Side Dish Pairings
- Recipe FAQs
- 📝 Recipe Card
The scent of roasting peppers always takes me back to my grandmother's kitchen. She didn't have a written recipe, just a "feel" for when the peppers were soft enough but still held their shape.
I remember the heavy sizzle of the beef hitting the cast iron and that sweet, slightly charred aroma that filled the whole house. It's the kind of meal that feels like a hug, a tradition passed down through generations of home cooks who knew that a few simple ingredients could make a feast.
For me, this dish is about the contrast. You have the slight sweetness of the roasted bell pepper, the savory depth of the browned beef, and the salty pull of melted cheese. I've spent years tweaking the rice to meat ratio because there's nothing worse than a filling that's too dry or, conversely, a pepper that collapses into a mushy heap.
We're going for something that feels old-fashioned but fits into a busy schedule. These Stuffed Bell Peppers aren't about fancy techniques, just about doing the basics right. We'll make sure the filling is juicy and the peppers are just tender enough to cut with a fork, without losing their structural integrity.
Trust me, once you get the steam pocket trick down, you'll never go back to the "dry bake" method.
Easy Classic Stuffed Bell Peppers
Right then, let's get into why this version actually holds up. Most people just shove meat and rice into a pepper and hope for the best, but the result is often a tough skin and a dry center. The secret is in how we manage the moisture.
By adding a bit of water to the bottom of the pan and covering it with foil, we create a mini sauna. This steams the peppers from the bottom up and the top down.
It's a method that respects the vegetable. If you just blast them in the oven, the tops burn before the bottoms soften. The two step process - steam then brown - gives you that professional finish without needing any special gear.
And honestly, don't even bother with low-fat cheese here; the sharp cheddar provides a necessary punch that cuts through the sweetness of the peppers.
But what about the filling? The key is to coat every single grain of rice in the tomato sauce before it even hits the pepper. If you just mix it in loosely, you get pockets of bland rice. We want a velvety, cohesive filling that binds together.
This ensures that every bite is consistent, from the first scoop to the last bit of charred pepper.
The Secrets Behind the Flavor
Understanding the "how" makes you a better cook. You don't need a degree, just a bit of curiosity about what's happening in your pan.
- The Steam Chamber: Covering the dish with foil traps moisture, which softens the tough cellulose in the pepper walls.
- Fat Based Flavor: Using an 80/20 beef ratio ensures the fat renders into the rice, preventing the filling from becoming a dry brick.
- Acid Balance: The tomato sauce provides acidity that breaks down the richness of the beef and cheese.
- Layered Seasoning: Salting the inside of the peppers before filling creates a seasoned "wall" so the vegetable doesn't taste bland.
| Method | Time | Texture | Best For |
|---|---|---|---|
| Classic Oven | 60 mins | Tender & Juicy | Family Dinners |
| Air Fryer | 30 mins | Charred & Firm | Quick Lunch |
| Slow Cooker | 4 hours | Very Soft | Set and Forget |
One thing I've noticed is that the type of rice you use really changes the vibe. Long grain white rice stays separate and light, while brown rice adds a nuttier, heartier feel. Either works, but just make sure it's already cooked. Trying to cook raw rice inside a pepper is a gamble that usually ends in crunchy grains.
Component Analysis
Not every ingredient is just "filler." Each one has a job to do in this recipe.
| Ingredient | Science Role | Pro Secret |
|---|---|---|
| Ground Beef | Structure & Fat | Brown it deeply for a richer base |
| Tomato Sauce | Binder & Acid | Use a thick sauce to avoid "soupy" peppers |
| Bell Pepper | Vessel & Sweetness | Choose peppers with flat bottoms so they don't tip |
| Sharp Cheddar | Flavor Accent | Grate your own for a smoother melt |
I once tried using lean 93/7 turkey without adding any extra oil, and it was a disaster. The filling was grainy and lacked that "soul" you get from the beef fat. If you're going leaner, you have to compensate with a bit more olive oil or a splash of Worcestershire sauce to keep things moist.
Choosing Your Best Ingredients
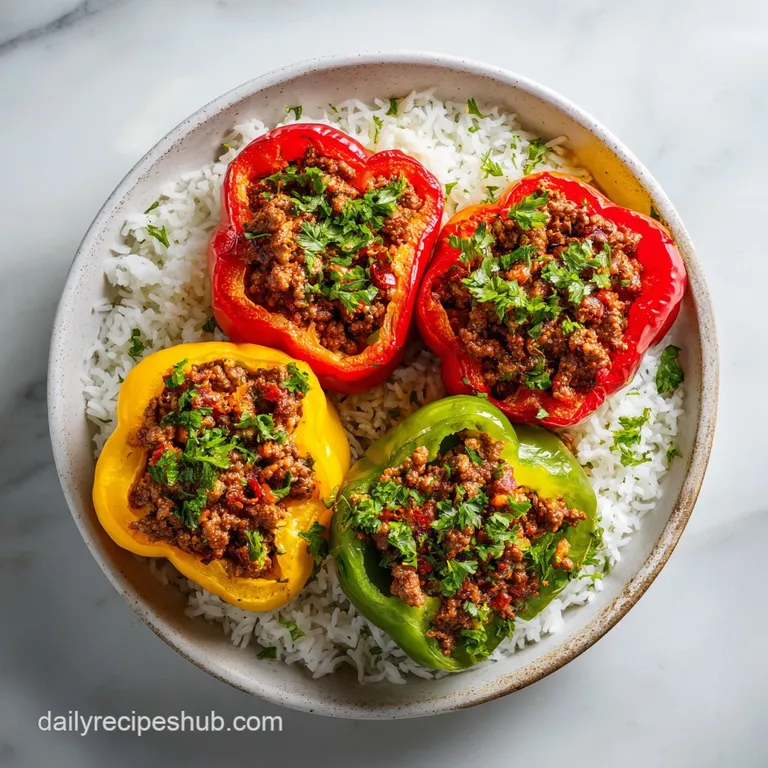
For the shells, grab 6 large bell peppers. I prefer a mix of red, yellow, and orange because they're sweeter than the green ones. You'll need about 3 lbs of them. Make sure they're firm to the touch. If they feel spongy, they'll collapse too quickly in the oven.
For the filling, we're using 1 lb of ground beef (80/20 is the gold standard here). According to USDA FoodData, the fat content in 80/20 beef provides the essential lipids that carry the flavor of the spices. Then you've got 2 cups of cooked rice - white or brown, whichever you prefer.
The aromatics are simple: one medium yellow onion and 3 cloves of garlic. For the sauce, a 15 oz can of tomato sauce does the trick. For seasoning, we've got 1 tsp dried oregano, 1 tsp smoked paprika, 1/2 tsp black pepper, and 1 tsp salt.
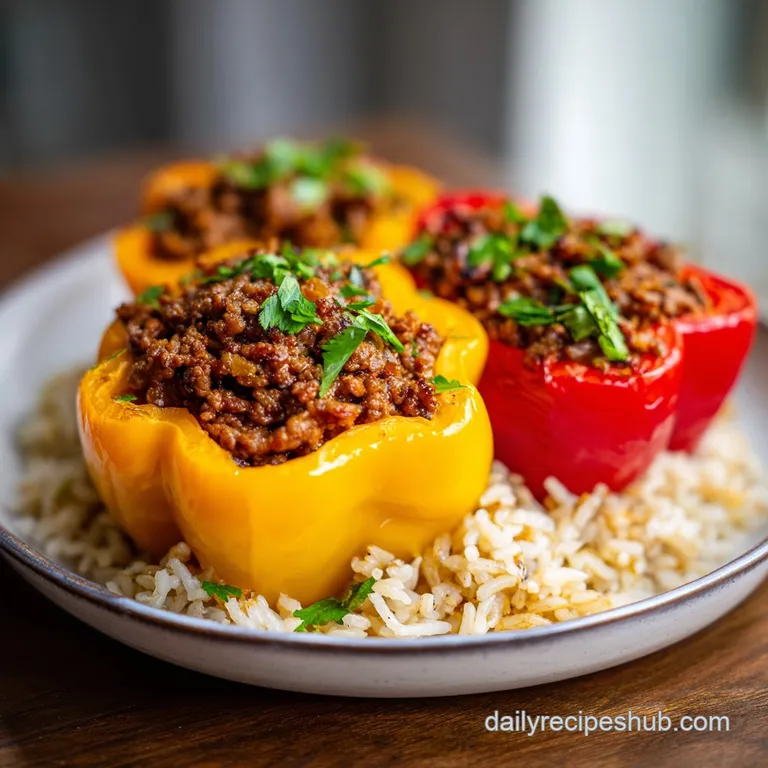
Finally, 1 1/2 cups of shredded sharp cheddar or mozzarella and some fresh parsley for that pop of color.
| Original Ingredient | Substitute | Why It Works |
|---|---|---|
| Ground Beef (1 lb) | Ground Turkey | Leaner option. Note: Add 1 tbsp oil to prevent dryness |
| White Rice (2 cups) | Quinoa | Higher protein. Note: Slightly nuttier taste |
| Sharp Cheddar | Mozzarella | Great stretch. Note: Milder flavor than cheddar |
| Tomato Sauce | Crushed Tomatoes | Chunkier texture. Note: More rustic feel |
Don't forget the olive oil (1 tbsp) and a pinch of salt for prepping the peppers. It seems like a small step, but rubbing the inside of the pepper ensures the oil penetrates the skin and the salt seasons the vegetable itself.
Tools You'll Actually Use
You don't need a kitchen full of gadgets for this. A large skillet is essential for browning the beef and simmering the sauce. I usually use a stainless steel or cast iron pan because they hold heat better, allowing the meat to get a proper sear.
A 9x13 inch baking dish is the right size for 6 peppers. If you use a pan that's too large, the water you add to the bottom will spread too thin and evaporate too quickly. If it's too small, the peppers will be crowded and won't steam evenly.
Finally,, you'll need a sturdy sheet of aluminum foil. Don't use the cheap, thin stuff that rips the moment you touch it. You want a tight seal to keep that steam trapped inside. A simple spoon for packing the filling is all else you need.
Step-by-step Cooking Guide
Let's crack on with the actual cooking. Follow these steps, and you'll nail it.
- Prep the peppers. Slice the tops off your 6 bell peppers and scoop out the seeds and membranes. Rub the insides with olive oil and a pinch of salt. Note: This prevents the peppers from tasting "raw" after baking.
- Brown the beef. Heat a large skillet over medium high heat. Add the ground beef and cook until it is no longer pink and slightly browned.
- Sauté aromatics. Toss in the diced onion and minced garlic. Sauté for about 5 minutes until the onions are translucent and fragrant.
- Simmer the sauce. Stir in the tomato sauce, oregano, paprika, salt, and pepper. Let it bubble for 2-3 minutes to marry the flavors.
- Fold in rice. Add the 2 cups of cooked rice. Stir gently until every grain is coated in the red sauce and the mixture is thick.
- Arrange peppers. Preheat your oven to 375°F (190°C). Stand the peppers upright in your 9x13 inch baking dish.
- Fill and steam. Spoon the filling into each pepper, pressing down gently to pack them tight. Pour 1/4 cup (60ml) of water into the bottom of the dish. Note: This water is the key to the steam pocket effect.
- First bake. Cover the dish tightly with foil. Bake for 30 minutes until the peppers are tender but still hold their shape.
- Add cheese. Remove the foil. Top each pepper with a generous handful of shredded cheese.
- Final roast. Bake for another 10-15 minutes until the cheese is bubbling and mahogany colored. Garnish with chopped parsley.
Chef's Tip: If your peppers are leaning or tipping over, slice a tiny sliver off the bottom to create a flat base. Just don't cut a hole in them, or your filling will leak!
Solving Common Cooking Issues
Even the best of us hit a snag. Here is how to handle the most common problems when making Stuffed Bell Peppers.
Peppers are still too firm
If you pull them out and the skin is still snappy or hard to pierce, you likely had a leak in your foil seal. Steam is the only thing that softens those walls quickly. Next time, crimp the edges of the foil more tightly.
Filling is too dry
This usually happens if the beef was overcooked or the rice was too dry before mixing. To fix this mid process, stir in a tablespoon of beef broth or water into the filling before stuffing.
Peppers are tipping over
Peppers aren't naturally flat. If they're wobbling, you can use "pepper braces" - small rings of foil or even other pepper slices - to prop them up.
| Problem | Root Cause | Solution |
|---|---|---|
| Bottoms are burnt | Too much water in pan | Use exactly 1/4 cup water |
| Cheese didn't brown | Oven temp too low | Ensure oven is fully preheated to 375°F |
| Mushy peppers | Overbaked (too long) | Reduce first bake by 5 minutes |
- ✓ Common Mistakes Checklist:
- ✓ Avoid using raw rice; always use pre cooked.
- ✓ Don't skip the foil cover for the first 30 minutes.
- ✓ Ensure the beef is fully browned before adding sauce.
- ✓ Don't overfill to the point of bursting; leave a tiny gap for cheese.
- ✓ Check that the water is in the pan, not inside the peppers.
Tweak Your Filling Options
One of the best things about this recipe is how flexible it is. Once you have the base method down, you can change the protein or the grain to suit your mood.
For a leaner version, try the ground turkey twist. Turkey is much drier than beef, so I recommend adding a teaspoon of Worcestershire sauce or a bit more olive oil to the pan. This keeps the texture velvety rather than crumbly. If you're looking for something even lighter, check out my low carb Philly cheesesteak casserole for another way to enjoy peppers with a punchy flavor.
If you want a vegetarian power up, swap the beef for a mix of cooked lentils and crumbled tofu. Use a bit of soy sauce or tamari to mimic the "umami" depth of the meat. You can also add diced zucchini or carrots to the onion sauté for extra nutrients.
For those who hate waiting for the oven, the air fryer shortcut is a game changer. Place the stuffed peppers in the basket and cook at 360°F for about 15-20 minutes.
Since you can't easily "steam" in an air fryer, you might want to pre steam the peppers in the microwave for 3 minutes first.
Finally, the low carb swap involves replacing the rice with cauliflower rice. Since cauliflower releases a lot of water, sauté it in the skillet for a few minutes to evaporate the moisture before mixing it with the sauce. This prevents your Stuffed Bell Peppers from becoming watery.
Adjusting the Batch Size
Sometimes you're just cooking for one, and other times you're feeding a crowd. Scaling this recipe is pretty straightforward, but there are a few rules.
When scaling down to a half batch (3 peppers), use a smaller baking dish, like an 8x8 inch square pan. Reduce the water in the bottom to 2 tablespoons. You'll also want to reduce the baking time by about 20%, as smaller batches often cook faster due to better air circulation.
If you're using an egg as a binder in a variation, beat it first and use half.
When scaling up to 12 peppers, don't just double the spices. Salt and smoked paprika can become overpowering if doubled exactly. I suggest increasing the spices to about 1.5x and tasting the filling before stuffing. You'll need two 9x13 inch pans; don't crowd them into one, or they'll steam too much and become mushy.
For larger batches, you can lower the oven temp by 25°F and extend the time. This ensures the peppers in the center of the pan cook through without the ones on the edges burning. Always work in batches when browning the meat to avoid boiling the beef in its own juices.
Debunking Kitchen Myths
There are a few things people tell you about Stuffed Bell Peppers that just aren't true. Let's set the record straight.
One big myth is that you must pre roast the peppers for an hour before stuffing them. While this makes them very soft, it's an unnecessary step. The steam pocket method we use here gets them to the perfect texture in a fraction of the time.
Another misconception is that searing the meat "seals in the juices." As any experienced cook knows, searing is actually about flavor. The browning creates a complex taste profile that you can't get from simmering. The juices are managed by the fat ratio and the sauce, not the sear.
Some people claim you have to use only green peppers for "authentic" flavor. In reality, red, orange, and yellow peppers are more versatile and generally preferred for their sweetness. Green peppers can be a bit bitter, which might clash with the creamy cheese.
Storage and Zero Waste
If you have leftovers, these Stuffed Bell Peppers keep surprisingly well. Store them in an airtight container in the fridge for up to 3-4 days. When reheating, I recommend a splash of water and a cover of foil in the oven at 350°F for 15 minutes.
This prevents the rice from drying out.
For the freezer, these are a meal prep dream. Let them cool completely, then freeze them in individual containers for up to 3 months. To reheat from frozen, thaw them in the fridge overnight and then bake as usual.
To keep things zero waste, don't throw away the pepper tops and seeds. You can toss the tops into a veggie scrap bag in the freezer. Once the bag is full, boil them with onion skins and carrot ends to make a basic vegetable stock.
Even the seeds can be dried and toasted with a bit of salt and paprika for a crunchy, spicy snack.
Perfect Side Dish Pairings
Because Stuffed Bell Peppers are such a complete meal (protein, veg, and carb all in one), you don't need much on the side. But a little something extra can really pull the table together.
A crisp, bright salad with a lemon vinaigrette is the best pairing. The acidity of the lemon cuts through the richness of the beef and cheese, refreshing your palate between bites. A simple mix of arugula, cucumber, and cherry tomatoes works perfectly.
If you're feeling fancy, some garlic sauteed spinach or roasted asparagus adds a nice earthy contrast. The bitterness of the greens balances the sweetness of the roasted peppers.
And for dessert? After a savory, hearty meal, you want something light and fruity. My Cheesecake Deviled Strawberries are a fantastic choice. They provide a creamy, sweet finish that doesn't feel too heavy after the beef and rice.
Right then, you've got everything you need to make a killer batch of Stuffed Bell Peppers. Just remember: brown your beef deeply, don't skimp on the cheese, and for heaven's sake, don't forget the foil. Happy cooking!
Recipe FAQs
Should I cook my bell peppers before stuffing them?
No, you don't need to. The 375°F oven temperature and the steam from the water in the baking dish soften them perfectly during the cooking process.
What can you stuff bell peppers with?
A savory blend of ground beef, cooked rice, and tomato sauce. Sautéed onion, garlic, oregano, and smoked paprika add the necessary depth of flavor.
Should I cover my stuffed peppers when I put them in the oven?
Yes, cover them with foil. Bake covered for 30 minutes to steam the peppers, then remove the foil for the final 10 15 minutes to brown the cheese.
What are some common mistakes when making stuffed peppers?
Leaving air gaps in the filling or forgetting the water in the pan. Pack the filling tight to keep the pepper upright and add 1/4 cup of water to the dish to ensure the peppers soften.
How to prepare the peppers for stuffing?
Slice the tops off and remove the seeds and membranes. Rub the insides with olive oil and a pinch of salt to prevent them from tasting raw after baking.
Is it true that stuffed peppers must be baked at 400°F to avoid being crunchy?
No, this is a common misconception. Baking at 375°F with a foil cover and water in the dish provides ample steam to soften the peppers fully.
How to reheat leftovers without drying out the rice?
Add a splash of water and cover with foil. Heat in the oven at 350°F for 15 minutes to keep the grains moist.
Beef Stuffed Bell Peppers