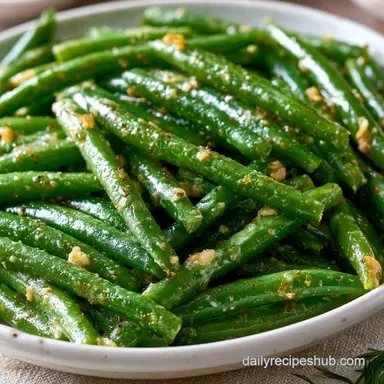
Best Ever Green Beans Recipe: Garlic Butter Glaze
- Time: 5 min prep + 10 min cook = Total 15 minutes
- Flavor/Texture Hook: Blistered, snappy beans with a savory garlic butter finish
- Perfect for: A fast weeknight side or an impressive holiday accompaniment
Best Ever Green Beans Recipe
Hear that? That high pitched sizzle when the beans first hit the shimmering oil is the sound of flavor happening. I used to be a "boil them until they're limp" kind of cook, thinking that was the only way to get them tender. All I ever got were grey, soggy pods that tasted like nothing.
It was a total letdown every single time, especially when I tried to make them for guests.
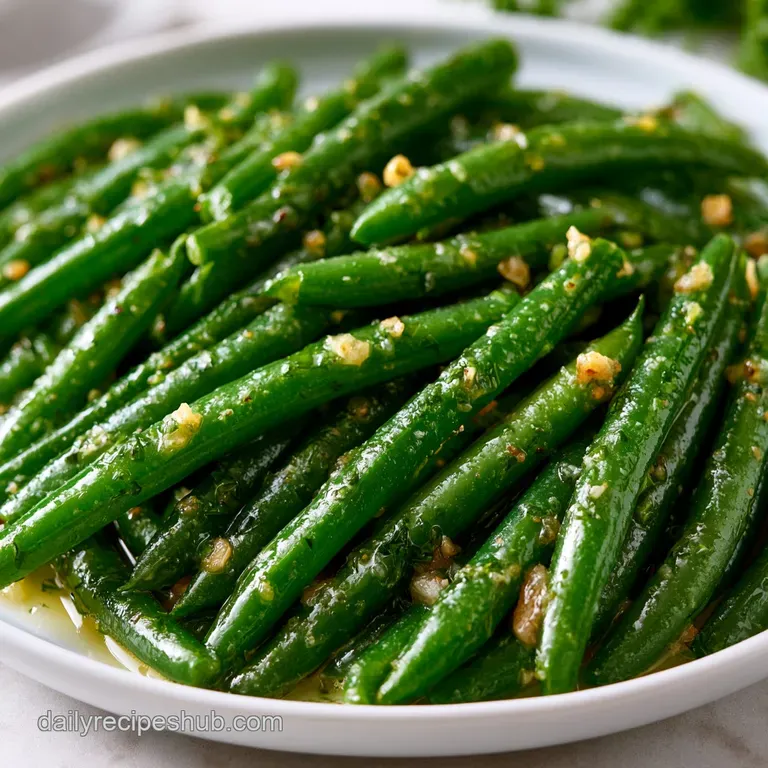
Right then, I realized the problem wasn't the beans, it was the water. Once I stopped drowning them and started searing them, everything changed. This Best Ever Green Beans Recipe is all about contrast: the charred, mahogany exterior and the tender, crisp interior.
Trust me on this, the difference is night and day. We're going for a result that feels fresh and bright, not something that's been stewing in a pot for an hour. It's a simple shift in technique, but it's the only way I'll make them now. Let's crack on.
The Secret to Snap
I'm not a scientist, but I've noticed that the way we apply heat changes everything for a bean. Instead of a long simmer, we use two distinct phases of heat to get that professional texture.
The Blister Effect: Searing the beans in olive oil first creates those brown spots. This doesn't just look cool, it adds a toasted flavor that you simply can't get from boiling.
The Steam Flash: Adding a tiny bit of water and covering the pan creates a miniature sauna. This cooks the inside of the bean quickly so they're tender but still have a distinct snap.
Acid Balance: The lemon juice at the end isn't just for taste. It cuts through the heavy butter and keeps the green color from fading into a dull olive tone.
Fat Coating: The butter and Parmesan form a velvety emulsion. This clings to the beans rather than pooling at the bottom of the plate.
| Method | Time | Texture | Best For |
|---|---|---|---|
| Stovetop (This Way) | 15 minutes | Blistered & Snappy | Quick meals, freshness |
| oven roasted | 20-30 minutes | Shriveled & Nutty | Large crowds, hands off |
| Slow Cooker | 4-8 hours | Very Soft & Savory | Southern style, potlucks |
Quick Recipe Specifications
Before we get into the grit, here is the breakdown of the flow. This is a plan based execution, meaning we move from high heat to controlled steaming and finally to a over low heat glaze.
The prep is minimal - just a bit of trimming. The cooking is fast, but you have to stay at the stove. Because we're using garlic and butter at the end, you can't walk away, or you'll end up with burnt garlic, which ruins the whole vibe.
If you're planning your dinner, remember that this dish is best served immediately. While it holds up okay for a few minutes, the snap is most prominent the second it leaves the pan.
Shopping List Breakdown
Stick to fresh beans here. Frozen can work in a pinch, but they have more moisture, which means you'll lose that mahogany sear. Check out USDA FoodData if you're curious about the nutrient density of fresh vs. frozen pods.
Component Analysis
| Ingredient | Science Role | Pro Secret |
|---|---|---|
| Fresh String Beans | Structural Base | Look for firm pods that snap when bent |
| Unsalted Butter | Flavor Carrier | Use European style for more velvety richness |
| Lemon Juice | Color Stabilizer | Always use fresh; bottled is too bitter |
| Parmesan | Umami Punch | Grate it yourself for a better melt |
The Full List
- 1 lb fresh string beans, trimmed Why this? Firm pods provide the best snap
- 2 tbsp water Why this? Creates the steam for internal cooking
- 2 tbsp unsalted butter Why this? Adds richness and helps the glaze stick
- 1 tbsp extra virgin olive oil Why this? Higher smoke point than butter for the sear
- 3 cloves garlic, minced Why this? Provides the aromatic base
- ½ tsp kosher salt Why this? Enhances all other flavors
- ¼ tsp freshly cracked black pepper Why this? Adds a subtle woody heat
- 1 tsp fresh lemon juice Why this? Brightens the flavor and saves the color
- 2 tbsp grated Parmesan cheese Why this? Adds a salty, nutty finish
- 1 pinch red pepper flakes Why this? Gives a tiny, undetectable kick
| Original Ingredient | Substitute | Why It Works |
|---|---|---|
| Unsalted Butter | Vegan Butter / Oil | Similar fat content. Note: Lacks the milky richness |
| Parmesan | Pecorino Romano | Similar salty profile. Note: Much tangier/sharper |
| String Beans | Haricots Verts | Thinner pods. Note: Cook 1-2 minutes less |
| Lemon Juice | Apple Cider Vinegar | Provides acidity. Note: Changes the flavor to "tangy" |
Honestly, don't even bother with low-fat cheese or margarine here. The fat is what carries the garlic flavor and gives you that silky mouthfeel. If you're avoiding dairy, a high-quality vegan butter works, but the Parmesan is hard to beat for that specific umami hit.
Essential Kitchen Gear
You don't need a fancy kitchen for this, but the pan choice is actually pretty important. I use a wide stainless steel or cast iron skillet. If you use a small, deep pot, the beans will crowd each other. When they're crowded, they steam instead of sear, and you'll lose those mahogany marks.
A tight fitting lid is the second most important tool. Since we only use 2 tablespoons of water, we need to trap every bit of that steam to cook the beans through without boiling them. If your lid is loose, you might need a splash more water.
Finally, a good pair of tongs. Stirring with a spoon can bruise the beans or push them around too much. Tongs let you toss them efficiently so every side gets a bit of heat.
The Cooking Process
Let's get into the flow. This is a fast process, so have your garlic minced and your butter measured before you even turn on the burner.
Prepping the Pods
Wash the beans thoroughly and pat them dry. This is a big one - if they're wet, they'll steam immediately and you won't get a sear. Trim the stem ends, avoiding cutting too deep into the bean.
Searing the Beans
Heat the olive oil over medium high heat until shimmering. Toss in the beans and sauté for 3-5 minutes until small, mahogany colored blister marks develop. You want to hear a constant sizzle here.
Steaming for Tenderness
Pour in the water and immediately cover the skillet with a lid. Let the beans steam for 2-3 minutes until they are al dente (meaning they have a slight bite but aren't raw).
Infusing the Garlic Butter
Remove the lid and let any remaining water evaporate. Lower the heat to medium and add the butter, minced garlic, salt, and pepper. Stir constantly for 1-2 minutes until the butter is foamy and the garlic is fragrant.
Finalizing the Glaze
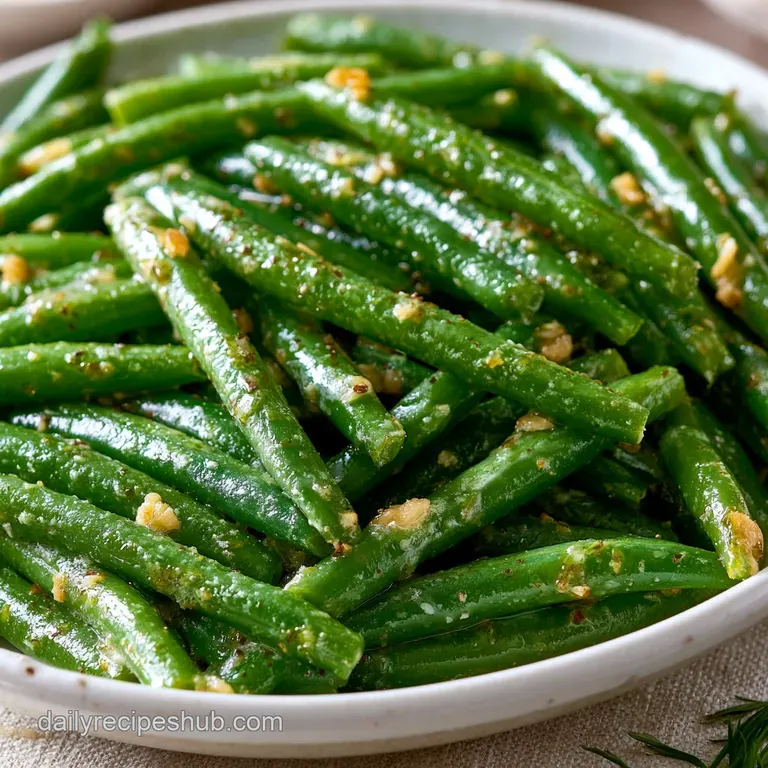
Remove from heat. Drizzle with fresh lemon juice and sprinkle with Parmesan and red pepper flakes. Toss to coat in the glaze.
Chef's Note: If you want a deeper flavor, try adding a pinch of smoked paprika with the garlic. It gives a "grilled" vibe even though you're on the stovetop.
Avoiding Kitchen Disasters
The most common issue I see is people overcooking the beans. Once they turn a dark, army green color, you've gone too far. They should be a vibrant, bright green. If you're unsure, just pull them off the heat - carryover cooking will finish them on the plate.
Another trap is the garlic. Garlic burns in seconds at medium high heat. That's why we lower the temperature and add the butter before the garlic. The butter acts as a buffer, protecting the garlic from the direct heat of the pan.
Why Your Beans Stay Hard
If your beans are still crunchy after the steaming phase, you likely didn't have a tight enough seal on your lid. The steam escaped, and the beans didn't reach the internal temperature needed to soften.
Why Your Garlic Burnt
This usually happens when the pan is too hot or you forgot to add the butter first. Burnt garlic tastes bitter and will overpower the delicate flavor of the beans.
Fixing the Grey Fade
If the beans look dull, it's usually due to overcooking or a lack of acid. Adding a fresh squeeze of lemon at the very end can often "wake up" the color and flavor.
| Problem | Root Cause | Solution |
|---|---|---|
| Sogginess | Too much water or over steaming | Use exactly 2 tbsp water; check at 2 mins |
| No Brown Spots | Pan wasn't hot enough or beans were wet | Heat oil until shimmering; pat beans dry |
| Bitter Taste | Garlic burnt during sauté | Lower heat to medium before adding garlic |
Common Mistakes Checklist
- ✓ Patting beans bone dry before they hit the oil
- ✓ Using a wide skillet to avoid crowding
- ✓ Adding garlic ONLY after the heat is lowered
- ✓ Removing from heat the moment the butter foams
- ✓ Adding lemon juice off heat to preserve brightness
Dietary Adaptations
This recipe is naturally quite clean, but you can easily tweak it depending on what you're eating. If you're following a keto plan, this is already almost there. For a more filling meal, you can try making this a Keto Cream Cheese Chicken Chili side dish.
Making it Vegan
Swap the butter for a high-quality plant based butter and the Parmesan for nutritional yeast. The nutritional yeast gives that same cheesy, nutty flavor without the dairy. Use a slightly higher amount of olive oil to ensure the beans don't stick.
Adding Smoky Bacon
For the Best Green Beans Recipe with Bacon, sauté 3 strips of chopped bacon first. Remove the bacon but keep the fat in the pan. Use that bacon fat instead of olive oil to sear the beans. Stir the crispy bacon back in at the very end with the Parmesan.
Going Southern Style
A Southern Style Green Beans Recipe usually involves a longer simmer. To adapt this, after the steaming phase, add a splash of chicken broth and a pinch of sugar. Let them simmer uncovered for 10-15 minutes until they're much softer.
Incorporating Root Veg
If you want a Green Beans with Potatoes Recipe, dice small Yukon Gold potatoes into 1/2 inch cubes. Sear the potatoes first for about 5-7 minutes until golden, remove them, then cook the beans as directed. Toss the potatoes back in during the garlic butter phase.
Managing Batch Sizes
When you're cooking for two, you might be tempted to just halve everything. But be careful with the liquids. If you use too much water in a small batch, you'll end up boiling the beans instead of steaming them.
Scaling Down (1/2 Batch):
- Use a smaller skillet so the water doesn't evaporate instantly.
- Reduce the steaming time by about 30 seconds.
- Be extra careful with the garlic, as 1.5 cloves can easily burn in a small pan.
Scaling Up (2x-4x Batch):
- Work in batches. This is the most important rule. If you dump 4 lbs of beans into one pan, they will release too much moisture and you'll never get that mahogany sear.
- Increase salt and pepper to about 1.5x rather than 2x. You can always add more at the end, but you can't take it away.
- Use a larger pot for the final toss to ensure the glaze is evenly distributed.
Busted Kitchen Myths
You've probably heard that you should boil beans in salted water for minutes before sautéing to "lock in" the nutrients. This is actually a myth. Boiling often leaches those water soluble vitamins into the pot, which you then pour down the drain.
The sear and steam method we're using here preserves more of the nutrients and the flavor.
Another common misconception is that you need to "blanch" beans in ice water to keep them green. While that works for salads, it's an extra step you don't need for a hot side dish. The quick steam and the hit of lemon juice do the same job without the hassle of two different pots of water.
Storage and Freshness
If you have leftovers, store them in an airtight container in the fridge for up to 3-5 days. The beans will lose some of their snap, but the flavor remains.
Reheating Tips: Avoid the microwave if you can. It makes the beans rubbery. Instead, throw them back into a skillet over medium heat with a tiny knob of butter. Heat just until they're warmed through - about 2-3 minutes.
Zero Waste Ideas: Don't toss the trimmed stem ends of the beans. I keep a "scrap bag" in the freezer. Once it's full, I throw the bean ends, onion peels, and carrot tops into a pot with water to make a quick vegetable stock. It adds a subtle, earthy depth to soups.
Best Pairing Ideas
These beans are a powerhouse side because they work with almost any protein. The acidity of the lemon and the richness of the butter complement heavy meats perfectly.
For a cozy weekend feast, I love serving these alongside some homemade Quick and Easy Pizza Dough pizzas. The fresh, snappy beans cut right through the cheesy richness of the pizza.
If you're doing a Sunday roast, these are the best green beans for Thanksgiving or Christmas. They pair brilliantly with roasted turkey or a glazed ham. The charred flavor mimics the taste of a grill, which fits the holiday vibe.
For a lighter meal, try them with a piece of seared salmon or a lemon garlic chicken breast. The flavors mirror each other, creating a cohesive plate.
Recipe FAQs
How do restaurants make green beans taste so good?
They use a combination of high heat searing and steaming. Sautéing the beans in olive oil first creates mahogany blister marks, while a quick steam with water ensures they stay tender crisp.
Are green beans okay for diabetics?
Yes, green beans are generally excellent for diabetics. They are low in calories and carbohydrates while providing essential fiber to help regulate blood sugar.
How to cook fresh green beans for a professional texture?
Sauté in olive oil over medium high heat for 3-5 minutes. Once blistered, add two tablespoons of water and cover with a lid to steam for 2-3 minutes until al dente.
What should I put on my green beans to make them tasty?
Use a blend of butter, garlic, lemon juice, and Parmesan. Adding these during the final two minutes of cooking creates a rich, savory glaze that clings to the beans.
Is it true that you must boil green beans before sautéing?
No, this is a common misconception. Sautéing first to blister the skin followed by a quick steam provides more flavor and a better snap than boiling.
How to cook fresh green beans southern style?
Sauté the beans with butter, minced garlic, salt, and pepper. Following this method ensures the beans are well seasoned and tender while retaining their vibrant green color.
What are some good ways to serve these green beans?
Pair them with a light protein for a complete meal. This side dish complements an easy summer dinner perfectly.
Best Ever Green Beans