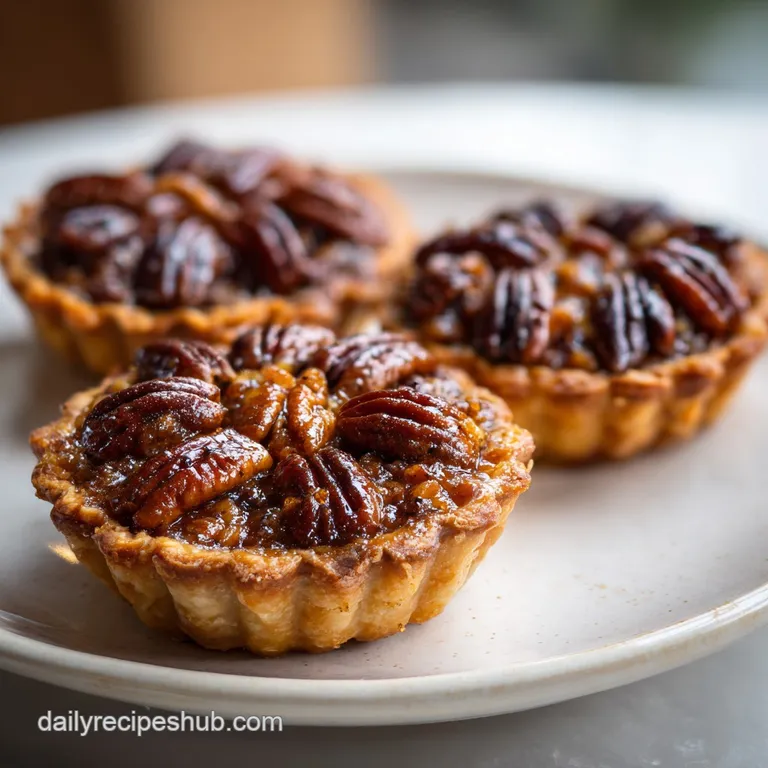
Guilt-Free Mini Pecan Pies: Rich and Buttery
- Time: 30 min active + 25 min bake = 55 min total
- Flavor/Texture Hook: Shatteringly crisp edges with a rich, buttery center
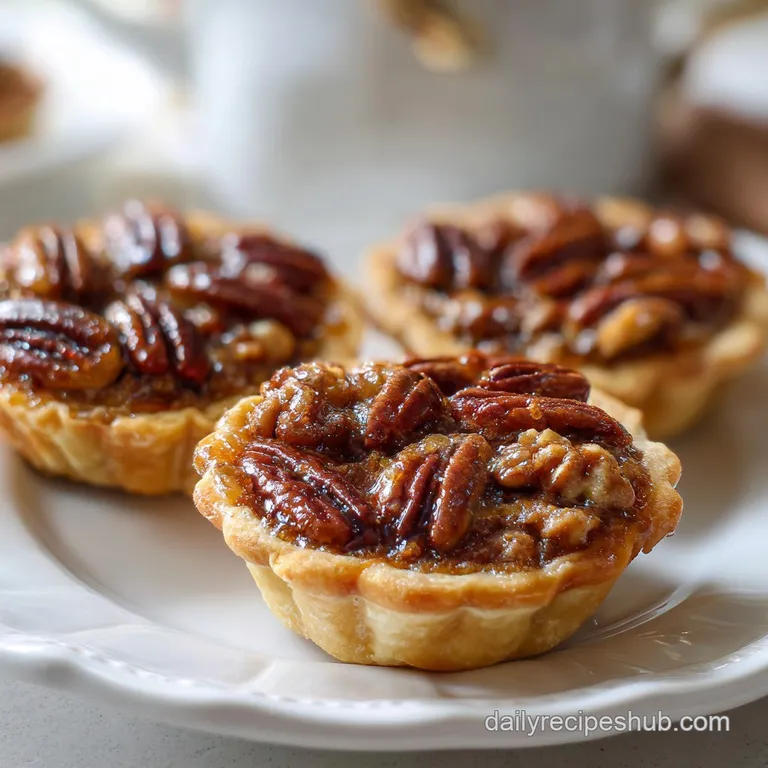
- Perfect for: Holiday dessert platters or a fancy weekend treat
- Easy Homemade Mini Pecan Pies
- Why These Minis Actually Work
- Ingredient Deep Dive
- Necessary Ingredients and Substitutes
- Essential Baking Tools
- The Step-by-Step Process
- Solving Common Baking Issues
- Creative Flavor Variations
- Adjusting The Batch Size
- Baking Beliefs Debunked
- Preservation and Waste Tips
- Best Serving Ideas
- Recipe FAQs
- 📝 Recipe Card
That smell is the first thing that hits you, right? It is that heavy, warm scent of toasted pecans and bubbling brown sugar that practically fills the whole house. I remember the first time I tried to make a full sized pecan pie for a family reunion.
I was so nervous about the center setting that I overbaked the edges until they were basically charcoal, while the middle was still a soupy mess. It was a total disaster that I tried to hide under a mountain of whipped cream.
After that, I realized that the secret to success is just shrinking everything down. When you make Mini Pecan Pies, you have way more control over the bake. You get that gorgeous, caramelized edge on every single bite, and you don't have to pray that the center sets before the crust burns.
It is honestly the only way I make these now because it takes the stress out of the process.
You can expect a treat that is decadent but not cloying. We are talking about a velvety filling that holds its shape but still has a little give, wrapped in a buttery shell that actually snaps when you bite into it. Trust me, once you go mini, you will never go back to the giant, sliced version.
Easy Homemade Mini Pecan Pies
Since we are keeping things simple, I want to make sure you have a plan. This isn't a "wing it" kind of bake, but it's also not rocket science. I like to break it down into three phases. First, the prep flow: getting your oven hot and your crusts pressed into the tin.
Second, the mixing flow: whisking your syrups and eggs into that golden emulsion. Finally, the finish: the bake and the critical cooling period.
If you rush the cooling, you'll end up with a filling that feels too soft. Let them sit for at least 20 minutes. This gives the sugars and eggs time to set up properly. Right then, let's look at why this specific approach avoids the common pitfalls of home baking.
Why These Minis Actually Work
- The Egg Bind: Using two large eggs provides the structure needed to hold the syrup and butter together. It creates a custard like set that prevents the pies from leaking.
- Maple Syrup Depth: Pure maple syrup has a lower water content than some substitutes and a more complex flavor. This helps the filling thicken faster in the oven.
- Surface Area: Because these are small, the heat penetrates the center much faster than in a 9 inch pie. This means you get a consistent texture from edge to center.
- Fat Distribution: Melted butter is stirred directly into the syrup. This creates a stable emulsion that keeps the filling silky rather than grainy.
| Method | Prep Time | Texture | Best For |
|---|---|---|---|
| Oven Baked | 30 mins | Shatteringly crisp | Traditional holiday parties |
| Air Fryer | 20 mins | Very crunchy edges | Small batches (2-4 pies) |
I've found that the oven is still king here because it provides a steady, surrounding heat that ensures the filling sets evenly. An air fryer can sometimes brown the pecan toppers too quickly before the center is actually done.
Ingredient Deep Dive
Understanding what each part does helps you make better choices if you're missing something in the pantry. I've spent way too much time swapping ingredients just to see what happens, so here is the real deal.
| Ingredient | Science Role | Pro Secret |
|---|---|---|
| Pure Maple Syrup | Primary sweetener & liquid | Use Grade A Amber for a balanced taste |
| Large Eggs | Binding & structure | Room temp eggs whisk smoother |
| Unsalted Butter | Richness & mouthfeel | Brown the butter first for a nuttier flavor |
| Flaky Pie Dough | Containment & crunch | Keep it cold until the very last second |
Necessary Ingredients and Substitutes
I'm a big fan of using All-Butter dough. Honestly, don't even bother with the low-fat versions; they don't have the structural integrity to hold the heavy filling. For the pecans, I use a mix of chopped ones inside and whole halves on top for that professional look.
- 1 cup (115g) chopped pecans Why this? Provides the essential crunch and nutty base
- 2 large (100g) eggs, room temperature Why this? Ensures the filling sets without curdling
- 1/2 cup (120ml) pure maple syrup Why this? Natural flavor and better viscosity than corn syrup
- 1/4 cup (50g) light brown sugar, packed Why this? Adds a molasses note and helps caramelization
- 3 tbsp (42g) unsalted butter, melted Why this? Creates a velvety, rich mouthfeel
- 1 tsp (5ml) vanilla extract Why this? Rounds out the sweetness with aromatic warmth
- 1/4 tsp (1.5g) salt Why this? Cuts through the sugar to balance the flavor
- 1 lb (450g) All-Butter flaky pie dough Why this? High fat content means a flaky, shatter like crust
- whole pecan halves for topping
| Original Ingredient | Substitute | Why It Works |
|---|---|---|
| Pure Maple Syrup | Honey | Similar viscosity. Note: Stronger flavor, may overpower pecans |
| Brown Sugar | Coconut Sugar | Similar color and depth. Note: Slightly grainier texture |
| All-Butter Dough | Puff Pastry | Very flaky. Note: Rises more, making the pie shallower |
| Pecans | Walnuts | Similar fat content. Note: More bitter, less sweet than pecans |
If you're looking for other party sized treats to serve alongside these, my cheesecake deviled strawberries are a great fresh contrast to the richness of the pecans.
Essential Baking Tools
You don't need a professional kitchen for this, but a few specific tools make it way easier. I use a standard 12 slot muffin tin. If you have a non stick one, great, but if not, just be generous with the butter or use parchment liners.
I also recommend a medium mixing bowl and a whisk. A fork works in a pinch, but a whisk gets the air into the eggs more efficiently, which helps the filling feel lighter. Finally, a sharp knife for chopping those pecans is a must.
The step-by-step Process
Let's crack on with the actual baking. Just remember to keep your dough cold. If it starts getting too soft while you're pressing it into the tin, pop it in the fridge for 5 minutes.
- Preheat the oven to 350°F (175°C). Fit the chosen crust into a 12 slot standard muffin tin, pressing the dough firmly against the bottom and sides. Note: Don't overwork the dough or it will shrink
- In a medium mixing bowl, whisk the eggs until smooth. Gradually beat in the maple syrup and light brown sugar.
- Stir in the melted butter, vanilla extract, and salt until the mixture is a uniform, golden hue.
- Fold in the chopped pecans until evenly distributed.
- Divide the filling evenly among the 12 crust shells.
- Place 3-4 whole pecan halves on top of each pie for garnish.
- Bake for 20-25 minutes until the edges are set and golden brown, but the center maintains a slight gelatinous wobble.
Chef Note: That "wobble" is the most important part. If the center is completely stiff when you pull them out, they'll be overcooked by the time they cool down. Trust the wobble!
Solving Common Baking Issues
Even the best of us mess up sometimes. The most common issue I see with Mini Pecan Pies is the "soggy bottom." This usually happens if the oven isn't hot enough or if you overfill the shells, which prevents the heat from reaching the bottom crust.
The Filling is Too Runny
If your filling doesn't set, it's usually because the eggs weren't beaten enough or the oven temperature was too low. Ensure your oven is fully preheated before the pies go in.
The Crust is Soggy
This is often caused by the filling absorbing too much moisture. Try pressing the dough thinner or ensuring your filling is well emulsified so the fats don't separate.
Burnt Topping Pecans
Since the pecan halves sit right on top, they can brown quickly. If you notice them getting too dark at the 15 minute mark, loosely tent a piece of foil over the tin.
| Problem | Root Cause | Solution |
|---|---|---|
| Filling overflows | Overfilled shells | Fill only to 3/4 capacity |
| Crust shrinks | Dough was too warm | Chill dough 10 mins before pressing |
| Rubbery texture | Overbaked | Remove when center still wobbles |
Common Mistakes Checklist
- ✓ Did you use room temperature eggs? (Cold eggs can cause the melted butter to seize)
- ✓ Is the oven actually at 350°F? (Use a thermometer if you don't trust your dial)
- ✓ Did you press the dough firmly into the corners? (Prevents filling leaks)
- ✓ Did you let them cool for 20 minutes? (Crucial for the final set)
Creative Flavor Variations
Once you've nailed the basic recipe, you can start playing around. I love adding a splash of bourbon (about 1 tablespoon) to the filling for a smoky, adult version. It pairs beautifully with the maple syrup.
For something different, try adding a pinch of cinnamon or nutmeg. If you want to go wild, you could put a tiny piece of dark chocolate at the bottom of each crust before adding the filling. It creates a hidden molten center that is honestly brilliant.
If you're putting together a bigger dessert spread, these go great with a peanut butter chocolate pie for those who want something even creamier.
Decision Shortcut If you want a smoky flavor, add 1 tbsp bourbon. If you want a salty sweet vibe, sprinkle flaky sea salt on top after baking. If you want a lighter crust, use pre made phyllo shells instead of pie dough.
Adjusting The Batch Size
If you're just making a few for yourself, you can easily scale this down. For a half batch (6 pies), just beat one egg in a small bowl and then use half of that mixture to keep the ratios exact. Reduce your bake time by about 20%, as smaller volumes of food in the oven can sometimes cook faster.
When scaling up for a party (24-36 pies), don't just multiply the salt and spices by 4. I find that salt and vanilla can become overpowering in large batches, so only increase those to about 1.5x or 2x.
Work in batches if your oven doesn't have great airflow; otherwise, the pies in the middle of the oven might stay runny while the outside ones burn.
Baking Beliefs Debunked
There is a common idea that you must blind bake your mini crusts to avoid sogginess. Honestly, for these Mini Pecan Pies, it's not necessary. The baking time for the filling is short enough that the crust cooks through perfectly without the extra step.
Another myth is that you need corn syrup for that "classic" texture. While corn syrup works, maple syrup provides a much richer flavor and a similar set. You aren't sacrificing quality by ditching the corn syrup; you're actually improving the dish.
Preservation and Waste Tips
These pies keep surprisingly well. Store them in an airtight container in the fridge for up to 5 days. I actually prefer them the next day because the flavors have more time to meld together.
For the freezer, these are a dream. Freeze them on a baking sheet for 2 hours first so they don't stick together, then toss them into a freezer bag. They'll last for 3 months.
To reheat, just pop them in a 300°F (150°C) oven for 5-8 minutes until they're warmed through.
To avoid waste, use those broken pecan pieces that usually end up at the bottom of the bag for the filling. You don't need perfect halves inside the pie, only on top. If you have leftover pie dough, roll it into small cinnamon sugar twists and bake them alongside the pies.
Best Serving Ideas
The best way to serve these is slightly warm with a dollop of unsweetened whipped cream. The cream cuts through the richness of the pecans and maple, making the whole thing feel lighter.
For a beverage match, a strong black coffee or a dark roast is the way to go. The bitterness of the coffee balances the sweetness of the brown sugar perfectly. If you're serving these at a brunch, they're also incredible paired with a glass of chilled prosecco.
Just remember to let them cool properly before you move them from the tin. If you try to lift them out while they're piping hot, the filling might slide, and you'll lose that beautiful, velvety center. Be patient, and the result will be worth it.
Recipe FAQs
Can I use cold eggs instead of room temperature?
No, use room temperature eggs. This ensures the eggs emulsify smoothly with the maple syrup and melted butter for a uniform filling.
Do I need to use corn syrup for the filling?
No, use maple syrup. It provides a deeper, more complex flavor and prevents the pies from tasting overly sugary.
How to determine if the mini pies are done?
Check for golden brown edges and a slight gelatinous wobble in the center. This typically occurs after 20-25 minutes of baking at 350°F.
How to fit the crust into the muffin tin?
Press the dough firmly against the bottom and sides. Use a standard 12-slot muffin tin to ensure the shells are secure and uniform.
Is it true the center must be completely firm before removing them from the oven?
No, this is a common misconception. The center should still have a slight wobble; if it is completely firm, the crusts will likely be overbaked.
How to prevent lumps in the filling?
Whisk the eggs until smooth before gradually beating in the maple syrup and light brown sugar.
Do I need to pre-bake the crust shells?
No, there is no need to blind bake. The small scale of these pies allows the crust to crisp perfectly during the 20-25 minute bake time.
Mini Pecan Pies

