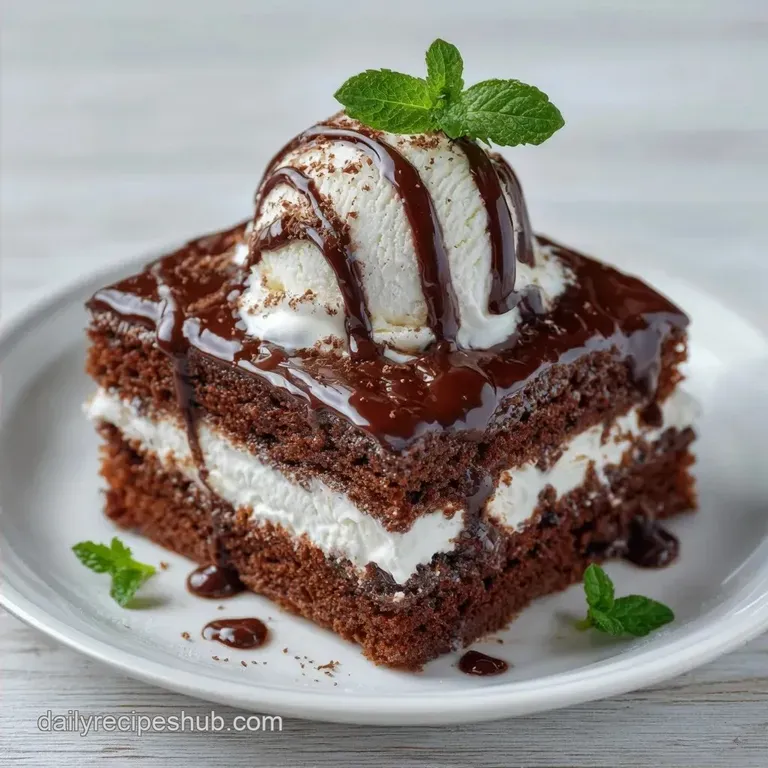
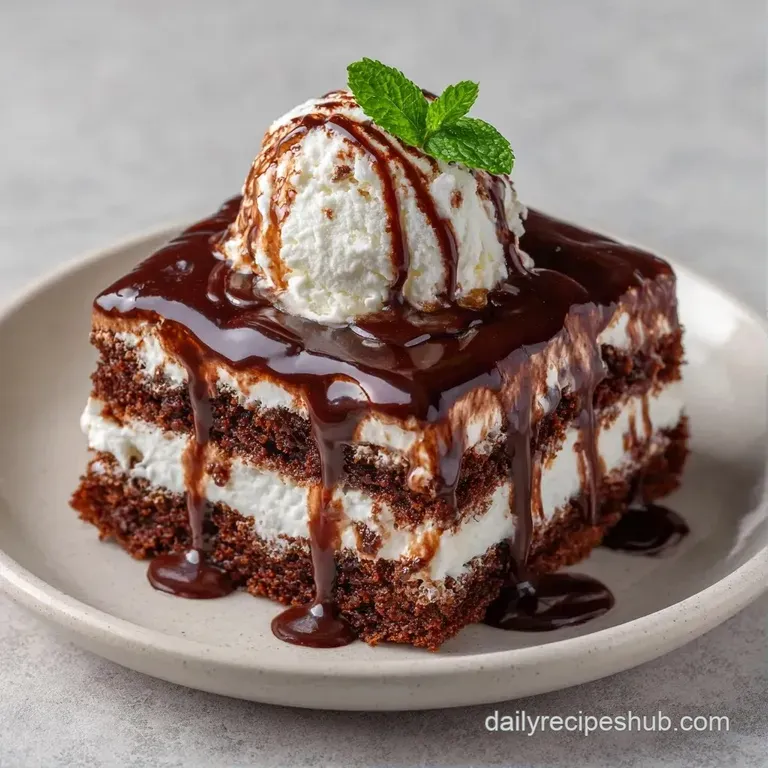
Homemade Ice Cream Cake: Fudgy Cocoa Base
- Time: 60 min active + 7 hours chilling
- Flavor/Texture Hook: Fudgy chocolate base with a crunch of Oreos
- Perfect for: Birthday parties, summer celebrations, or a big family treat
- Homemade Ice Cream Cake That Stays Put
- Why This Build Works
- What Each Ingredient Does
- The Ingredient List
- Tools You'll Need
- Step-by-Step Process
- Fixing Common Issues
- Swaps and Twists
- Freezing and Storage
- Serving Suggestions
- Scaling the Recipe
- Kitchen Myths
- Final Thoughts on the Process
- Recipe FAQs
- 📝 Recipe Card
Homemade Ice Cream Cake That Stays Put
I remember a birthday party years ago where we bought a fancy store-bought cake. It looked great for about five minutes, but as soon as the candles were blown out, it started to slump. By the time we cut the first slice, it was more of a puddle than a cake.
I spent the rest of the night wondering why the layers just gave up.
That's why I started messing around with my own version. I wanted something that had a real bite to it, not just frozen cream and air. I found that starting with a warm, baked chocolate base changes everything. It gives the ice cream something to grip onto, so you get a clean slice every time.
This Homemade Ice Cream Cake balances that rich, oven baked chocolate flavor with the cold hit of vanilla and chocolate ice cream. We've got a layer of crushed Oreos and hot fudge in the middle for a bit of a surprise.
It's a bit of a project because of the freezing time, but the result feels like something from a high end bakery.
Why This Build Works
The Vinegar Lift: Mixing distilled white vinegar with baking soda creates an immediate reaction. This makes the chocolate base light and airy, so it doesn't feel like a brick under the ice cream. According to King Arthur Baking, this acid base reaction is a classic way to get a good rise in cakes without using eggs.
Temperature Control: Letting the ice cream soften just a touch before spreading is key. If it's too hard, you'll tear the cake base. If it's too melted, the layers bleed into each other and you lose those clean lines.
The Fat Barrier: Using a layer of hot fudge and crushed cookies acts as a divider. This keeps the vanilla and chocolate ice cream distinct, similar to how a Hot Fudge Ice Cream Cake handles its richness.
| Base Method | Time | Texture | Best For |
|---|---|---|---|
| Baked Cocoa Base | 35 min | Fudgy and sturdy | Tall cakes, clean slices |
| No Bake Cookie Crust | 10 min | Dense and buttery | Quick treats, tart style |
| Frozen Brownie | 45 min | Chewy and heavy | Ultra rich desserts |
What Each Ingredient Does
I've found that using the right cocoa powder makes a huge difference. Don't go for the cheapest option, as it can taste metallic. A good natural cocoa powder keeps the base tasting like real chocolate.
| Ingredient | What It Does | Best Swap |
|---|---|---|
| Distilled White Vinegar | Reacts with soda for lift | Apple cider vinegar |
| Heavy Whipping Cream | Creates a stable frosting | Coconut cream (thick part) |
| Condensed Milk | Stabilizes the cream | Mascarpone cheese |
| Oreo Cookies | Adds texture and crunch | Graham crackers |
The Ingredient List
For the chocolate cake base, you'll need: - 1.5 cups all purpose flour - 1 cup granulated sugar - 1/3 cup unsweetened cocoa powder - 1 tsp baking soda - 1/2 tsp salt - 1 cup warm water - 1/3 cup vegetable oil - 1 tsp vanilla extract - 1 tsp distilled white vinegar Why this? Triggers the rise in
The oven.
For the filling and frosting: - 1 quart vanilla ice cream - 1 quart chocolate ice cream - 1/2 cup hot fudge sauce - 20 Oreo cookies Why this? Provides a distinct crunch. - 1/4 cup condensed milk Why this? Stops the frosting from melting. - 2 cups heavy
Whipping cream - 1/2 cup powdered sugar - 1 tsp vanilla extract
Tools You'll Need
You don't need a professional kitchen for this, but a few things make it easier. I highly recommend a 9x13 inch baking pan with high sides.
An offset spatula is a lifesaver here. It lets you smooth the ice cream without pressing too hard and crushing the cake. If you don't have one, a wide butter knife works, but it takes a bit more patience.
Finally, make sure you have parchment paper. Don't just grease the pan. Lining the bottom and sides with an overhang lets you lift the whole Homemade Ice Cream Cake out of the pan effortlessly.
Step-by-step Process
1. Baking the Foundation
Preheat your oven to 350°F (175°C). Grease your 9x13 inch pan and line it with parchment paper, leaving a bit of an overhang on the sides. Whisk the flour, sugar, cocoa powder, baking soda, and salt in a large bowl.
Stir in the warm water, oil, vanilla, and vinegar until the batter looks smooth. Pour it into the pan and bake for 30-35 minutes until the center springs back lightly when touched. Let it cool completely.
2. The Strategic Layering
Take your chocolate ice cream and let it sit on the counter for 5-10 minutes. Spread it evenly over the cooled cake base. Drizzle your room temperature hot fudge over the chocolate ice cream. Coarsely crush your Oreo cookies and sprinkle them across the top, pressing them in lightly.
3. The Final Freeze
Soften the vanilla ice cream slightly and spread it over the cookies, smoothing it until the top is level. Put the pan in the freezer for 3 hours. While that's happening, whip the cold heavy cream, powdered sugar, and vanilla in a mixer until stiff peaks form.
Stir in the condensed milk to stabilize it. Spread the frosting over the frozen cake and freeze for another 3 hours before you serve it.
Chef's Note: If your ice cream is too hard to spread, don't microwave it. Just let it sit for a few minutes or use a hair dryer on the surface for 30 seconds.
Fixing Common Issues
It's easy to run into a few snags with a Homemade Ice Cream Cake, mostly because you're dealing with different temperatures at once.
Ice Cream is Too Hard
If you struggle to spread the layers, you're probably fighting the freezer. The ice cream should be the consistency of soft serve. If it's a brick, let it sit at room temperature for 10 minutes.
The Cake Base is Too Soggy
This usually happens if the cake wasn't cooled completely before adding the ice cream. The residual heat melts the bottom layer, creating a slushy mess. Always wait until the cake is room temperature.
Frosting is Melting
If the whipped cream starts to slide, the cake wasn't frozen enough before frosting. The surface needs to be rock hard.
| Problem | Root Cause | Solution |
|---|---|---|
| Slumping layers | Ice cream too soft | Freeze for extra hour |
| Dense cake base | Overmixing the batter | Stir until just combined |
| Icy frosting | Cream not cold enough | Chill bowl and whisk |
Swaps and Twists
You can easily change the vibe of this recipe. If you want something a bit more sophisticated, swap the Oreos for toasted hazelnuts or almond slivers. For a different flavor profile, you could use a homemade caramel sauce instead of hot fudge.
Flavor Twists - Peanut Butter Dream: Use peanut butter ice cream and add a layer of chopped Reese's cups. - Minty Fresh: Swap the chocolate ice cream for mint chip and use dark chocolate shavings.
Diet Swaps - dairy-free: Use coconut based ice cream and a vegan whipped topping. Note: The texture will be slightly softer. - gluten-free: Use a 1:1 GF flour blend. The cake may be slightly more fragile, so leave it in the pan.
Freezing and Storage
This Homemade Ice Cream Cake lasts in the freezer for about two weeks. To keep it from picking up freezer smells, wrap the pan tightly in plastic wrap and then a layer of aluminum foil.
Freezing Instructions
If you're making this a few days early, that's fine. Just make sure the frosting is fully set before wrapping. When you're ready to serve, let it sit on the counter for 5-10 minutes. This makes it much easier to cut without the cake base cracking.
The Clean Slice Technique
To get those bakery style slices, dip a long knife in hot water and wipe it dry between every single cut. The heat slices through the frozen cream like butter.
Serving Suggestions
This is a very rich dessert, so it's great to pair it with something that cuts through the sweetness.
Warm Berry Coulis A tart raspberry or blackberry sauce poured over the top adds a bright contrast. The heat from the sauce creates a tiny bit of melt on the ice cream, which is a great texture contrast.
Fresh Espresso or Cold Brew The bitterness of a strong coffee balances the sugar from the fudge and condensed milk. A small cup of black coffee is the traditional way to serve a heavy cream cake like this.
Scaling the Recipe
If you're making this for a smaller group, you can scale it down to a half batch. Use an 8x8 inch square pan instead of the 9x13. Reduce the baking time by about 20%, as the smaller volume cooks faster. For the egg less cake, you just halve the measurements.
For a larger party, you can double it, but don't do it in one giant pan. Use two 9x13 pans. If you try to make it too deep, the center won't freeze properly, and you'll end up with a soft middle.
When doubling the ingredients, be careful with the salt and vinegar. Only increase those to 1.5x instead of 2x. Too much vinegar can leave a tangy aftertaste in the chocolate base.
Kitchen Myths
You might hear that you need to "seal" the cake base with a layer of melted chocolate to prevent sogginess. That's not necessary here. The fat in the ice cream and the density of the cocoa base provide enough of a barrier on their own.
Another common myth is that you have to use a stand mixer for the whipped cream. While it's faster, a hand mixer or even a whisk and some arm strength works just as well. The key is the temperature of the cream, not the tool you use.
Final Thoughts on the Process
Making a Homemade Ice Cream Cake is mostly a game of patience. The actual work takes about an hour, but the waiting is what makes it. By taking the time to bake the base and freeze it in stages, you're building a dessert that actually holds its shape.
Right then, you've got the plan. Just remember to keep your cream cold and your cake cooler. Trust the freezing times, and you'll have a showstopper that doesn't melt the moment it hits the table. Let's get baking.
Recipe FAQs
How do I make an ice cream cake?
Bake a chocolate cake at 350°F and cool it completely. Layer softened chocolate ice cream, hot fudge, and Oreos, then top with vanilla ice cream and freeze for 6 hours total before frosting with whipped cream.
What kind of cake is used for ice cream cake?
A sturdy chocolate cake is used. Using cocoa powder and vinegar creates a stable base that maintains its texture and doesn't become overly brittle after freezing.
Can I use box cake mix for ice cream cake?
Yes, box mixes are a convenient alternative. Just ensure the cake is completely cold before adding the ice cream layers to prevent the frozen toppings from melting.
What is the frosting on ice cream cake made of?
It is a stabilized whipped cream. This is made by whipping cold heavy whipping cream, powdered sugar, and vanilla extract until stiff peaks form.
What other summer desserts can I serve alongside this ice cream cake?
Fresh, tart desserts provide the best balance. If you enjoyed the creamy texture here, see how we balance richness with acidity in our key lime parfaits.
How much ice cream do I need for a 9x13 cake?
Use two quarts of ice cream. This recipe requires one quart of chocolate and one quart of vanilla to achieve the necessary thickness for the layers.
Is it true that ice cream cakes must be no-bake?
No, this is a common misconception. While no-bake crusts are common, a baked cake layer provides a professional structure and a deeper flavor profile.
Homemade Ice Cream Cake

