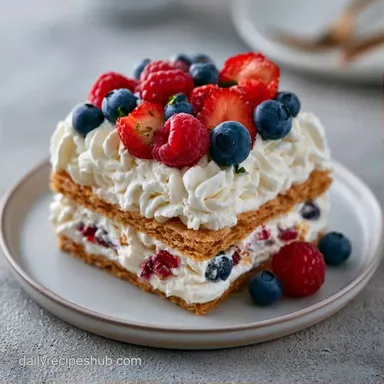
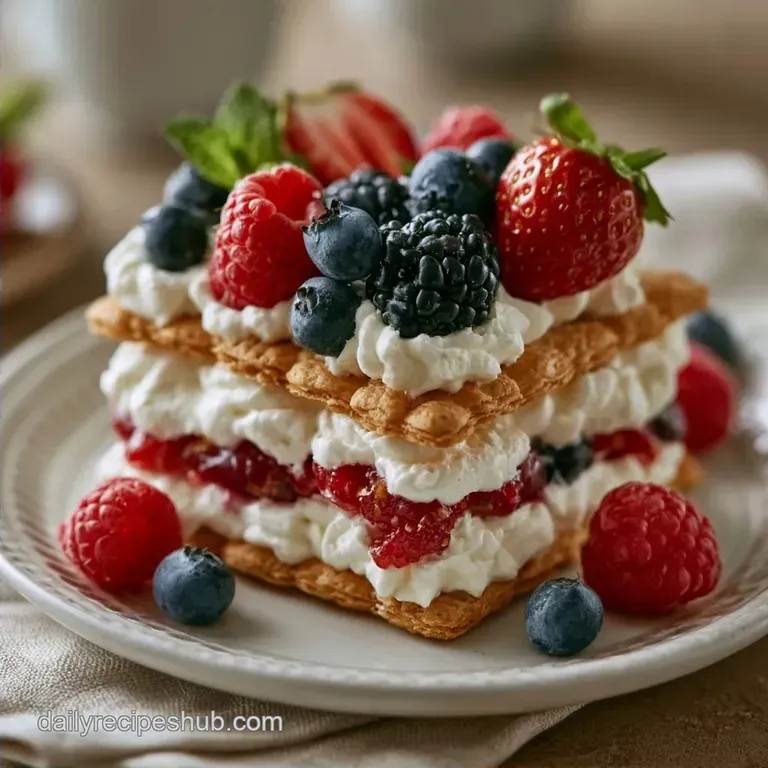
Guilt-Free No Bake Berry Icebox Cake
- Time: 20 min active + 8 hours chilling
- Flavor/Texture Hook: Tangy cream with soft, cakey layers
- Perfect for: Summer potlucks and beginner bakers
I once tried a shortcut version of this dessert using thin wafers and a generic whipped topping. The result was a disaster. It tasted like wet cardboard and the layers slid apart the second I tried to slice it, leaving me with a pile of berry flavored mush on a platter.
The trick is using honey graham crackers and a stabilized cream. This version doesn't slide or turn into a soggy mess. Instead, it holds its shape while staying light.
You can expect a dessert that feels like a cross between a cheesecake and a shortcake. This No Bake Berry Icebox Cake is designed for people who want something that looks impressive but requires almost zero actual cooking.
Why the Layers Work
- Moisture Migration: The graham crackers act like sponges. They pull moisture from the cream and berries over eight hours, which softens them into a cake like crumb.
- Yogurt Stability: Pure whipped cream often weeps or collapses. Adding strained Greek yogurt gives the filling more body and a slight tang that cuts through the sugar.
| Fresh Berries | Frozen Berries | Impact on Texture | Savings |
|---|---|---|---|
| Firm, distinct bites | Softer, releases more juice | Can make layers too wet | $2-4 per bag |
| Bright, natural pop | Muted sweetness | Less structural integrity | Minimal |
What Each Ingredient Does
| Ingredient | What It Does | Best Swap |
|---|---|---|
| Heavy Cream | Provides the airy structure | Mascarpone (richer) |
| Greek Yogurt | Adds stability and tang | Sour cream |
| Graham Crackers | Creates the "cake" layers | Digestive biscuits |
| Fresh Berries | Adds acidity and freshness | Mango slices |
What You'll Need
- 16 oz cold heavy whipping cream Why this? High fat content is needed for stable peaks
- 1/2 cup powdered sugar Why this? Dissolves instantly without grains
- 1/2 cup plain Greek yogurt, strained Why this? Thickens the cream for better layering
- 1 tsp vanilla extract Why this? Adds a warm base note
- 1 tbsp lemon zest, finely grated Why this? Brightens the heavy dairy
- 1 box (14 oz) low sugar honey graham crackers Why this? Less sugar prevents the cake from being cloying
- 2 cups fresh strawberries, thinly sliced
- 1 cup fresh blueberries
- 1 cup fresh raspberries
Necessary Kitchen Tools
You don't need a fancy kitchen for this. A hand mixer or a stand mixer like a KitchenAid works, but a whisk and some elbow grease will also do the job. You'll need a 9x9 inch glass baking dish, a rubber spatula for folding, and plastic wrap.
How to Build It
Phase 1: Whipping the Stabilized Cream
- Put the heavy cream, powdered sugar, and vanilla in a chilled bowl. Beat on medium high until soft peaks form.
- Gently fold in the Greek yogurt and lemon zest using a spatula until the mixture is smooth and velvety. Note: Do not overbeat here or the cream will turn into butter.
Phase 2: The Architectural Layering
- Place a single layer of graham crackers at the bottom of your 9x9 inch dish. Break a few crackers to fit the edges exactly.
- Spread 1/3 of the cream mixture over the crackers. Smooth it all the way to the edges.
- Scatter a handful of sliced strawberries and blueberries across the cream.
- Repeat the process two more times. Add crackers, then cream, then berries.
Phase 3: The Final Garnish and Set
- Finish the top with a final layer of cream.
- Arrange the remaining raspberries and blueberries in a decorative pattern across the surface.
- Cover the dish tightly with plastic wrap.
- Refrigerate for at least 8 hours. Note: This is when the magic happens and the crackers soften.
Fixing Common Mistakes

If you've ever had a no bake dessert fail, it's usually a moisture issue. Too much liquid from the fruit can make the bottom layers mushy, while not enough chilling time leaves the crackers crunchy.
Why Cream Collapses
If your cream loses its air, you likely overmixed it after adding the yogurt. Once the fat globules break, the structure fails. Use a spatula for the final fold instead of a mixer.
Too Much Moisture
Using frozen berries that weren't fully thawed and patted dry will leak juice into the cream. This creates "puddles" at the bottom of the dish. Always use fresh, dry berries for this specific no bake graham cracker icebox cake.
Hard Cracker Layers
If you cut into the cake and the crackers are still hard, it simply hasn't rested long enough. The moisture needs time to travel from the cream into the center of the cracker.
| Problem | Root Cause | Solution |
|---|---|---|
| Soup like texture | Not enough chilling time | Chill for a full 8-12 hours |
| Grainy cream | Sugar didn't dissolve | Use powdered sugar, not granulated |
| Slipping layers | Over beaten cream | Fold yogurt in by hand |
Dietary Changes
You can tweak this recipe to fit your needs, though some changes affect the set. If you want something even lighter, you might enjoy my Whipped Cream Berry Cake which uses a different base.
For a lower sugar version, use sugar-free graham crackers and replace the powdered sugar with a monk fruit sweetener. The texture remains almost the same, though the sweetness is less sharp.
If you need a dairy-free option, coconut cream is a decent substitute for heavy cream, but it requires a longer chill time because it's less stable. According to USDA FoodData, Greek yogurt provides the necessary protein for structure, so if you swap it for a vegan alternative, choose a thick, cashew based cream to keep the layers from sliding.
Scaling This Recipe
When making a larger batch for a party, don't just double the cream in one bowl unless you have a very large mixer. It's better to work in batches to ensure you get those soft peaks.
Scaling Down (Half Batch): Use a 4x9 inch loaf pan. Reduce the chilling time by about 20%, though 6 hours is still the minimum.
Scaling Up (Double Batch): Use a 9x13 inch pan. I recommend increasing the graham crackers to two boxes. For the seasonings, only increase the vanilla and lemon zest by 1.5x to avoid overpowering the berries.
| Original Size | New Pan | Adjustment | Result |
|---|---|---|---|
| 9x9 inch | 4x9 inch | 50% Ingredients | Thicker layers |
| 9x9 inch | 9x13 inch | 2x Ingredients | More servings |
Kitchen Truths
Some people say you must use a specific brand of crackers for this to work. That's not true. Any honey or cinnamon graham cracker works as long as they aren't the "thin" variety. Thin wafers don't absorb moisture the same way and can leave the cake feeling disjointed.
Another common thought is that you can use any berry. While true, avoid high water fruits like watermelon or pineapple. They release too much liquid and will turn your cake into a pudding. Stick to the berries recommended by King Arthur Baking for the best structural results in no bake desserts.
Storage and Waste
Keep this cake in the fridge, tightly covered. It stays fresh for about 3 to 4 days. After that, the crackers can become too soft, and the berries may start to release too much juice.
Freezing Guidelines: You can freeze this for up to 2 months. Slice it into portions first and wrap each piece in parchment paper. Thaw in the fridge for 4 hours before eating.
Zero Waste Tips: If you have leftover berry scraps or bruised fruit, don't toss them. Simmer them with a splash of water and a pinch of sugar to make a quick coulis. Drizzle this over the slices when serving to add an extra punch of flavor.
Serving Your Dessert
For the cleanest slices, dip your knife in hot water and wipe it clean between every single cut. This prevents the cream from smearing across the beautiful berry layers.
This No Bake Berry Icebox Cake is quite rich, so I love serving it with a side of fresh mint leaves or a small scoop of lemon sorbet. If you're in the mood for something even colder, this pairs well with a slice of Homemade Ice Cream Cake for a full blown dessert platter.
Decision Shortcut: If you want a tangier taste, add an extra teaspoon of lemon zest. If you want a firmer slice, let it chill for 12 hours instead of 8. If you want more crunch, add a layer of crushed nuts between the crackers.
Recipe FAQs
What is a great no-bake dessert for a hot summer day?
No Bake Berry Icebox Cake is an ideal choice. It uses fresh berries and a chilled cream mixture to stay refreshing without using an oven. If you enjoy this light profile, you might also like the tartness of a lemon layer cake.
Can I use frozen berries instead of fresh ones in this recipe?
No, stick with fresh. Frozen berries release too much moisture as they thaw, which would make the graham crackers soggy and bleed color into the cream.
How do I ensure the crackers achieve a cake like texture?
Refrigerate the assembled cake for at least 8 hours. This allows the moisture from the cream to fully soften the graham crackers.
How long can I keep the icebox cake in the fridge?
Keep it covered for 3 to 4 days. After this period, the crackers can become too soft and the berries may release excess juice.
Is it true that I can serve the icebox cake immediately after layering?
No, this is a common misconception. The dessert requires a minimum 8-hour chill time to transform the crackers from crunchy to a cake like consistency.
How do I combine the Greek yogurt into the whipped cream without deflating it?
Gently fold the yogurt and lemon zest using a spatula. Use a slow, lifting motion until the mixture is smooth and velvety to avoid overbeating.
Can I freeze this berry icebox cake?
Yes, it freezes well for up to 2 months. Slice the cake into portions, wrap each in parchment paper, and thaw in the fridge for 4 hours before eating.
No Bake Berry Icebox Cake